
How to Trim Clips in the Organize Tab
-
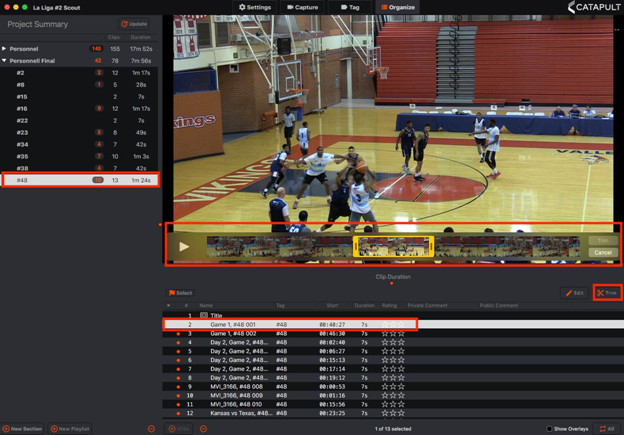
Navigate to the Organize Tab to trim tagged clips.

-
Click on the Tag from the Project Summary Box to bring up a playlist of clips that this selected Tag has been applied to. The playlist will populate under the Video Window.
-
From the playlist, select to highlight the clip that you want to trim.
-
Click on the Trim button that is located in the top right corner of the playlist area. A scroll bar will appear with a yellow box around your current clip.
-
Move either side of the yellow rectangle to add or reduce the length of your clip. After adjusting your clip, click on the highlighted blue Trim button to save the changes.

-
From the Project Clips box, the total Duration of video that has the selected Tag applied will adjust according to the changes made via the trim.
Trim Buffering
The user can adjust the amount of video (in seconds) that a selected clip can be extended past the original clip when trimming.
- From the Vision menu bar select Vision. Click Preferences.

-
Click the Organize tag from the Preferences menu.
- Beside 'Trim Buffer' adjust the amount of time (in seconds) that you want to make available at the start and end of each clip when trimming.
Comments
0 comments
Please sign in to leave a comment.